Saturday, January 22, 2022

Track layout planning becomes reality

 The trials and tribulations of a Railway Modeller are at there greatest when all of those plans you’ve been scratching out for ages, meet the reality of laying track. 

Yep I’m just about there. Well actually I’m at the fun bit, gluing down the cork. Fun? I hear you say? It is for me, at least for now, as I’m doing the front three modules. There have been a few moments of head scratching, and checking of track diagrams and alignment of points matching the sweeping curves of the main yard area. The yard in front of the goods shed is a busy location, with the Mainline running closest to the front of the layout, and the Goods sidings or loops in behind.

The design of the layout with the gentle curve of the central module, seems to be coming together, which is pleasing, and tinged with relief. 


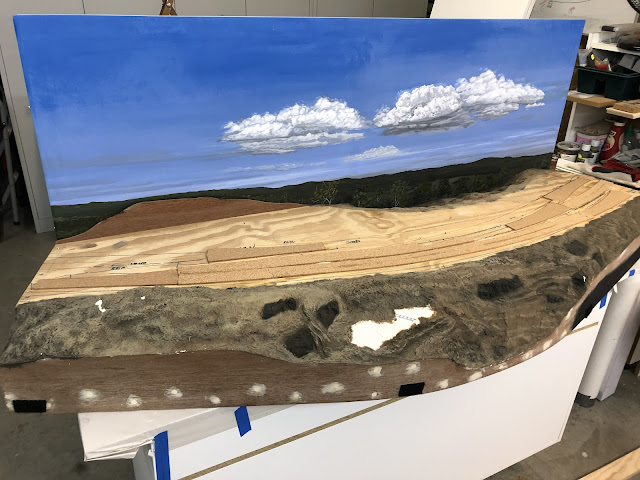
The cork for the tracklaying has been a little scarce, which hopefully means there are a lot more modellers out there making some progress, great stuff! I’ve built a set of legs for the modules to attach to the end of the above central module, that is at seated working height. This makes it much easier to work on the module, than at display height. As I’ve said many times before, I prefer a high display height so that you are immersed in the scene, but for working on the modules seated height is perfect.

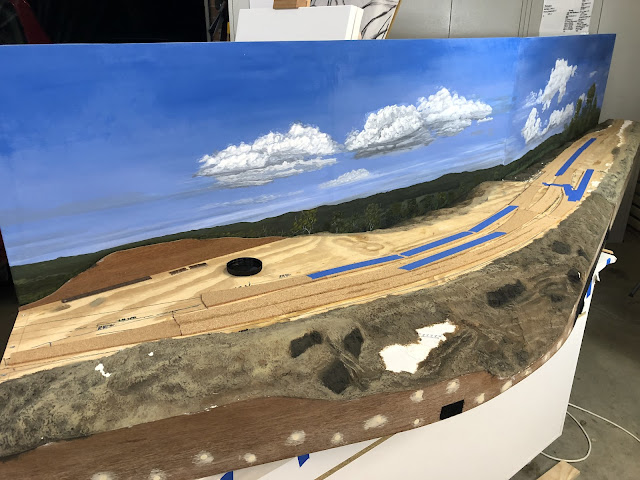
I am just up to gluing down the cork between modules, and I’ve attached two together to achieve that. I will be leaving at least two together so that I can begin fixing down the track next. The benefits of using the commercially available track should really see things move along faster once I begin this part of construction.


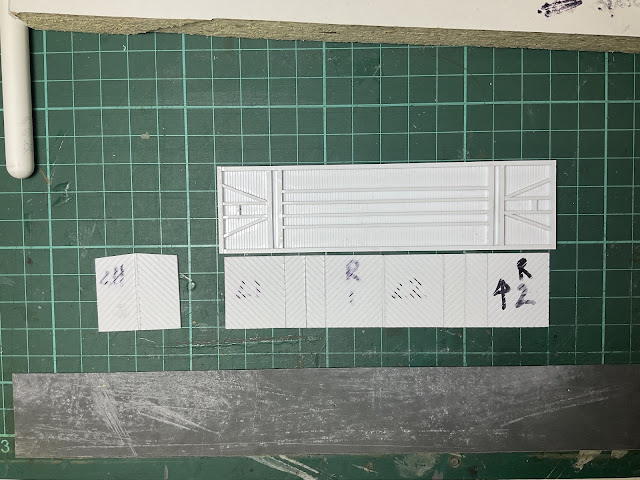
After that it will be onto the ballast. That really feels miles away from the above photo. The ballast I’ve chosen is as close to what I think would have been used in the early railways around 1880. Most of the imagery I’ve been able to find has the look of sandstone about it, very pale. Further research and help from others has led me to believe that the pale look of sandstone is much like what was being used.

So for now, I shall leave this post here,

Enjoy your week,

Happy modelling!

Oorroo!

Geoff.

Monday, January 10, 2022

The BRC project part 1

 From time to time a new discovery can lead you off on a tangent that seems to go on forever.  Whilst browsing through the SJM website I came across something I’d not heard of before. That discovery was a bogie kit from Stephen Johnson Models of an 1890’s ‘Passenger bogie’. My first thought was why the ‘’? Then the rabbit hole beckoned! Out with the books and then reading, reading, reading. 

I’ve only been able to find a couple of photos online of the BRC wagons, and this one is another variation of them. The door locations are similar, however this one has roof hatches. A different batch, different builder, and an evolving design. I will post photos of the model as I go.

A chance flick through the pages had me come across the early refrigeration vans, and in particular the BRC vans. In the description there was a reference to the bogies being ‘passenger’. There it was! I was hooked. Some further reading and the variations between orders and development of the type of wagon certainly had me thinking that this could be a scratchbuilding project worth pursuing. It has been such a long time since I’d scratch built anything, I was ready to have a crack at this one. At the same time, in my head, a little voice was saying ‘what about the BSV’s?’ Yep, I hear ya, next time for sure!

There were two main variants that took my fancy as they both had the same under frame. There was a vertical boarded version and a herringbone boarded version. I thought I could start with two of each and see how I go.


Here’s a photo of the progression of the under frames, all held in the jig in this next photo, then the underfloor is added, as can be seen, next.


The under frame was fairly simple, however I would need a couple of jigs to get things moving, of course, where would I be without a jig? The longitudinals were a bit of an issue, as the styrene I was using kept flexing if they were even a little bit too long. To aid in keeping the ends square a very handy tool I’ve used a lot for this project is the ‘true sander’. It allows a square end to be maintained as you sand, great for a project like this.

The floor would be glued on top of the chassis, with the plan to have it act as a form for the vertical sides of the body to align against. That means that it is 1mm in from the top edge of the chassis.

I’m wondering if I should get some Pinksil and cast this before I go any further, well at least before it goes together. It’s taken me so long to get to this stage, I am considering it, just so I can complete more as I require, especially of the herringbone sided body as it’s going to be just so fiddly to get one right. 


Next up I have to look at the underside plan for plates and bolts, and see if there’s any real benefit in doing these as well. Out with the plan! You know, for the size of the plates, and bolts, I’m not sure that there’s any benefit of adding such fine detail to the underside of a wagon. If I do cast this, then for the sake of completing one, it may well be worth adding the extra detail, more to think on for sure.

Here’s the first part of the side work up against the under frame, and one end. 

I’m now working on a side and end, with the thought of casting them. I’m waiting on having time to purchase some 1/4 round for the corners of the van. Once they are on I’m then into the detailing of the doors, and hinges.

I will leave it there for this week,
Enjoy your time at the workbench,
Oorroo!
Geoff.


Sunday, January 2, 2022

Having a go at figurine painting

This post isn't just about figure painting. It is for me about doing more in our hobby, striving to do a better job, than last time, and learning new techniques from others or discovering new ones yourself.

For a few of you, you may have seen my other layout Splitters Swamp Creek. I thoroughly enjoyed the process of building, scenicing (is that a word?) and displaying my layout at shows and conventions. There was one thing that irked me, the lack of people, SSC was empty of a population.
So that is something I'd like to change on Hoskins Hollow.

A population isn't just the people it's the loco drivers, guards, passengers, shop keepers, carts, cars, horses, shoppers and just people living their lives. I enjoy modelling a time well before our own, around the 1920's or so, and that has a certain look, as in the dress and uniforms. When you start to look around for figures of this time period you find there aren't too many around. There used to be one done by preisler, for about the 1900's, so if you have one you'd like to part with, please let me know. In the Australian market there are a couple worth mentioning, of course it is worth noting that I am not involved with these businesses. Stephen Johnson/Andian models have their 3D printed scans of people with amazing detail, and also Mechanical Branch models have theirs. I've enjoyed the choice that having more than one supplier gives, and this can be extended if you are willing to purchase from Modelu in the U.K.

I've ordered a few different 3D prints from all three businesses. The UK ones are everyday shopkeepers and shoppers, and a few other assorted ones to go with the predominantly NSWGR ones purchased from the other two. There has been a great article about painting figures in the AJRM, their most recent edition, and I guess it has been a great catalyst for having a go, and moving forward into something new.

There are moments that my grandiose ideas are completely at odds with my actual abilities as a modeller, maybe it's at these times that there is an opportunity to learn and achieve more, maybe. So to illustrate my point, here's a photo of a model that I was looking at, admiring, and hoping to copy.
The reality of how small a HO figurine is, comes at you like a slap in the face with a wet fish, as soon  as you pick up a brush. I reached for the modelling glasses, the over the front of those magnifying visor, and there you go! There is no way the above is going to be possible, but maybe a little bit. The shading and dry brushing may be enough. I have used a pale wash when painting another figure in a scale aircraft I built recently, and it made a huge difference.

I've several colours I've gathered for the face, skin and clothes of my NSWGR employees. I've had a crack at the first one. I painted all the skin area’s first, then the shirt closest to that, then waist coat, pants and shoes.


The zoom  function of the camera quickly up any issues with your painting, and in the above photo you can see that the dry brush is way too heavy, especially on the pants. I have some paint thinner that I will use to reduce the pigment load of the paint and retry the dry brush, but you can see what I’m trying to do. 

This has been fiddly , but enjoyable, well worth having a go at. I’ve plenty more to perfect my technique. It has been a case of fear of something new for me, and for a long time I’d put the figures aside. Now I’m definitely of the opinion that you only see them with your normal vision, so don’t fuss too much when you have your super powerful, see dust on the moon, vision aids on your head.

For the sake of posting something, I will stop here.
Let’s hope and plan for a better 2022. 

Have a great week,
Ooroo!
Geoff.